How to Gut and Clean Your Fish on the Boat: A Spearfisher’s Practical Guide
Introduction
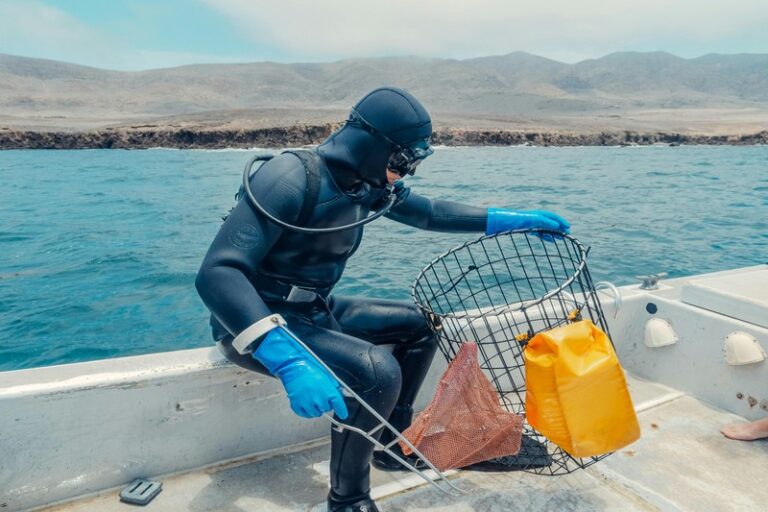
You’ve had a good dive. Your stringer is full, and now you’re bobbing in the chop with a boat deck that’s about to get messy. Cleaning fish after spearfishing isn’t glamorous, but how you handle that first hour determines whether your dinner is exceptional or just edible. Everyone focuses on the shot placement and the breath-hold. Nobody talks about what happens next.
There’s nothing worse than ruining a perfect catch with a sloppy cleaning job. I learned that the hard way.
I’ve cleaned hundreds of fish on boats ranging from 14-foot tinnies to serious offshore rigs. The difference between a good fillet and a wasted one almost always comes down to speed and a sharp knife. You can’t afford to hesitate when the fish is still warm. This guide covers the entire process from bleeding to chilling, specifically for the realities of a rocking boat deck. Not a stainless steel kitchen counter.
This isn’t about being fancy. It’s about getting the best meat off the fish and into your cooler before the quality drops.

Why Clean Your Fish on the Boat (And Not on the Dock)
The temptation to throw your catch in a bag and deal with it at the cleaning table on shore is strong. I get it. You’re tired. The boat needs hosing down. But every minute you wait works against you.
Cleaning fish after spearfishing on the boat gives you three critical advantages. First, the meat quality. The moment a fish dies, enzymes start breaking down muscle tissue. Bacteria multiply fast in warm seawater. If you gut and bleed that fish while it’s still stiff, you stop that spoilage process before it starts. The fillets stay firmer, cleaner, and taste noticeably fresher. Second, it’s easier. A whole fish with its guts intact is awkward. It slides around. It’s heavier. A cleaned fillet is compact, easy to rinse, and goes straight into the ice. Third, you avoid the dock circus. Cleaning tables at busy ramps are crowded, covered in other people’s scales and blood, and attract birds and bugs. Doing it on your boat keeps the mess contained to your own cooler.
Waiting until you get home often means dealing with a fish that has softened, developed an off smell, or simply become harder to handle because rigor mortis has set in awkwardly. You also lose the chance to ditch the waste overboard legally and cleanly. Do it now. Your future self will thank you when the fillets are perfect and your kitchen doesn’t smell like low tide.
Gear You’ll Need: The Essential Toolkit for Boat Cleaning
You can’t clean fish well with bad tools. Trying to fillet a wahoo with a dull, short blade on a wet fiberglass seat is a recipe for frustration and a trip to urgent care. Invest in the right setup, and the job becomes ten times faster.
The Knife. This is essential. You want a dedicated fillet knife with a flexible blade between 6 and 9 inches. A stiff blade is for chopping, not following the backbone. A flexible blade lets you work around the rib cage and get every scrap of meat off the skin. I prefer a high-carbon stainless steel blade that holds an edge well and resists corrosion. Brands like Dexter-Russell and Rapala make affordable, reliable models. Beginners who are looking for a first blade may want to consider a flexible 6-inch fillet knife for its control on smaller fish. Keep a sharpening steel or a ceramic rod handy on the boat. A dull knife is more dangerous than a sharp one because you have to use more force, and it slips. Touch up the edge between every third or fourth fish.
The Cutting Board. Do not use a plastic kitchen cutting board. It will slide right off your cooler lid. You need a board with a non-slip surface or a built-in clamp system. Some boards have a lip that hooks over a gunwale. Others have a rubber base. A dedicated non-slip boat fish cleaning board with a groove to channel off blood and scales makes a huge difference. Look for one with a flat, non-porous surface that won’t absorb smells.
Gloves and Towel. A pair of cut-resistant gloves, like Honeywell or Ansell HyFlex models, protects your hands from fins, gill plates, and knife slips. They also provide grip when your hands are wet and slimy. Keep a dedicated fish towel—an old kitchen towel works fine—to wipe your hands and the knife between fish. Microfiber towels are great because they dry fast.
The Bucket or Fish Bag. You need something to hold fillets as you work. A five-gallon bucket works. A collapsible fish bag, like those from Yeti or Engel, keeps them contained and makes it easy to transfer everything to the cooler. Avoid using the same container you used for the whole fish. Once fillets hit a bloody bucket, they pick up that smell.
For knife maintenance on the water, a simple diamond rod or a ceramic honing steel costs under $20 and extends the life of your blade between proper sharpenings. It’s a small investment that saves you from fighting with a dull knife when conditions are already rough.
Step 1: Bleeding the Fish Immediately
This is the single most important step, and it needs to happen seconds after the fish is on the boat, not minutes. Bleeding removes the blood from the muscle tissue. Blood contains enzymes and bacteria that break down the meat. A fish that isn’t bled properly will have dark, unappealing fillets and a stronger, fishier taste.
For most fish, you make a clean cut behind the gills, severing the main blood vessels. Insert the knife tip into the soft area just behind the gill plate and cut straight down to the backbone. Do this on both sides. The fish’s heart will pump the blood out. For larger fish like tuna or wahoo, you can also cut the tail off just behind the anal fin. This allows for even faster drainage. I’ve found that cutting both the gill area and the tail is the most effective method for fish over 10 pounds.
Hold the fish over the side of the boat or into a bucket of seawater. Let the blood drain for at least 30 seconds. Don’t just set it on the deck. Gravity helps. If you’re in a current or moving slowly, just let the fish trail in the water briefly. This rinses away the blood before it congeals. Some spearfishers will even carry a small hand pump to help flush the cavity, but I’ve never found it necessary for reef fish. For large pelagics, it can be helpful.
Do this before anything else. Gutting comes later. Bleeding first ensures the cleanest fillets.
Step 2: Gutting Your Catch – The Quick and Clean Method
Once the fish is bled, you gut it. This removes the internal organs, which are the first things to spoil and can taint the meat if left inside. Do this over the side of the boat or over a dedicated gut bucket. Minimizing mess on the deck makes the rest of the trip more pleasant.
Position the fish belly-up on your cutting board. Insert your knife tip into the vent, the small anal opening located between the anal fin and the tail. Make a shallow incision up the belly toward the throat. Stop just below the gills. Be careful here. The internal organs, especially the stomach and intestines, are delicate. A deep cut can puncture them, spilling contents into the cavity and ruining the meat.
Once the incision is made, reach in with your fingers and pull the entire mass of organs out in one motion. It usually comes out clean if the fish is fresh. For bigger fish, you might need to use a spoon or a dedicated gut hook to break the connective tissue near the throat. Watch for the gallbladder. It’s a small, dark green or brown sac attached to the liver. If you puncture it, bile will spill into the cavity and give the meat a bitter flavor. If that happens, rinse the cavity thoroughly with seawater immediately.
After the organs are out, use your thumb or a kitchen spoon to scrape out the bloodline along the backbone. This dark strip of tissue is full of blood. Remove it. Then, with your knife tip, make a small cut behind the gills and pop them out. Rinse the cavity with seawater. If you can’t use a hose, dip the fish in the ocean and swish it around. A clean cavity is the goal.
The whole gutting process should take less than 60 seconds per fish for most common species. Speed matters because the longer the fish sits, the warmer it gets.
Step 3: Scaling or Skin Removal? It Depends on the Fish
Now you need to decide whether to scale or skin. This isn’t a matter of preference. It depends entirely on the species and how you plan to cook it.
Scale the fish when you plan to cook it with the skin on. This is common for fish like snapper, grouper, or porgy. The skin is edible and protects the flesh from burning on the grill. Scaling removes the rough, inedible outer layer. Use a scaler or the back of your knife. Work from tail to head, scraping against the grain. Do this overboard. Scales fly everywhere.
Skin the fish when the skin is tough, has a strong flavor, or you plan to use the fillet for something like ceviche or sashimi. Tuna, wahoo, mackerel, and most pelagic species are usually skinned. Also, some fish like triggerfish have such thick, hard scales that scaling is impractical. Skin them.
The tradeoff is time and mess. Scaling is faster and requires less dexterity on a moving boat. Skinning takes more knife control but produces a cleaner final product. If you’re in a hurry or conditions are rough, scaling is the easier route. If you have a steady hand and a sharp knife, skinning is the better final result for most table fare.
For a beginner, start with scaling fish that have large, easy-to-remove scales. Move to skinning once your fillet knife technique is solid. You’ll ruin a few fillets learning to skin. It’s normal.

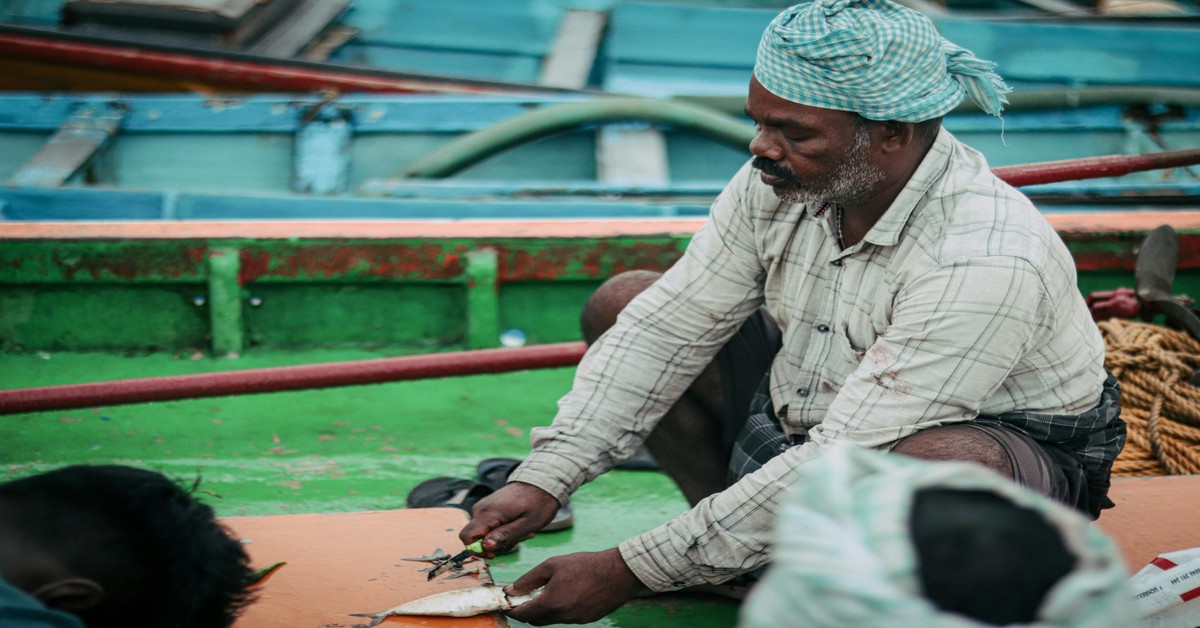
Step 4: Filleting on the Boat – The Efficient Technique
This is where the skill work happens. Filleting on a boat is harder than at a kitchen counter because the cutting surface moves, and you’re usually crouched or leaning over. Adapt your technique for the conditions.
First, secure the fish. Place it on your non-slip cutting board. If it’s a larger fish, you can put a towel under it to stop it from sliding. Make your first cut just behind the gill plate, angling the knife toward the head. Cut down until you hit the backbone. Then, turn the knife flat and run it along the backbone toward the tail. Use long, smooth strokes. Don’t saw. Let the knife do the work.
When you reach the tail, cut through the skin. Now you have a fillet attached only at the rib cage. Run your knife flat between the fillet and the ribs, using the blade tip to separate the meat. For most fish, you can remove the entire side in one piece. Flip the fish and repeat on the other side.
The rib cage is the tricky part. On smaller fish, you can just cut through the ribs. On larger fish, you’ll need to remove them individually. Use the knife tip to slice under each rib, freeing the meat. Don’t be afraid to leave a little meat on the bones. Getting every last scrap is less important than keeping the fillet intact.
On a moving boat, brace yourself. Plant your feet wide. Keep your elbows in. Use your non-knife hand to pin the fish down. If the boat rocks, use your core to stabilize, not your arms. A sudden lurch can send your knife into your hand. Work in a rhythm. One fish at a time. Do not rush.
If you are cleaning fish after spearfishing a large batch, stack the fillets in a clean bucket or fish bag as you go. Don’t let them sit in the sun.
Common Mistakes Beginners Make When Cleaning Fish
I’ve watched dozens of new spearfishers make the same errors. Avoid these and your fillets will look like they came from a pro.
Not bleeding fast enough. This is number one. If you wait five minutes, you’ve already lost a significant amount of quality. The blood starts coagulating almost immediately. Bleed the fish before you even take your fins off.
Using a dull knife. A dull knife requires more pressure, which makes it slip. Slipping on a fish with a sharp knife is bad. Slipping with a dull knife is worse because you use more force. Sharpen your knife before every trip, and touch it up between fish. A sharp knife is a safe knife. Frequent users may benefit from a ceramic honing rod to maintain a consistent edge on the water.
Leaving the skin on for certain cooking methods. The skin of a fish like a wahoo is tough and strongly flavored. Cook it with the skin on and it’ll be chewy and unpleasant. Skin it. For snapper, the skin is delicate and crispy when grilled. Keep it. Know your fish.
Not chilling the meat properly. Fillets that sit on a warm deck for an hour degrade quickly. They get soft. The texture changes. Even if you clean them perfectly, warm fillets are a waste. Get them on ice within fifteen minutes of the fish coming over the side. I’ve seen excellent spearos ruin a mess of fish by getting distracted talking or rigging gear. Don’t be that guy.
What to Do with the Carcass and Scraps: Practical Disposal
You’ve got a pile of scales, guts, heads, and bones. What now? This is the part people forget until they’re ankle-deep in fish waste on the deck.
The most practical method is to dispose of the waste overboard, but you need to do it properly. Do not dump it in a harbor or a protected area. Take the boat to deeper water, away from swimmers and boat ramps. The scraps will sink or be eaten by crabs, lobsters, and other bottom-dwellers. Some areas have regulations about chumming or dumping fish parts, so check local laws. In general, discarding clean fish waste in open water is acceptable.
If you’re in an area where you can’t dump overboard, bag the waste in heavy-duty garbage bags and dispose of it at a designated fish-cleaning station or in a dumpster onshore. But this is messy and smelly. It’s better to deal with it on the water.
I keep a dedicated five-gallon bucket for guts and heads. Once I’m done, I pitch the contents overboard, rinse the bucket with seawater, and stow it. Don’t let the bucket sit in the sun. The smell is unforgettable and will permeate everything.
A final note: never leave scraps in your cooler or on the boat. They rot fast and attract pests. Clean up immediately.
Keeping Your Catch Cold: The Best On-Board Cooling Solutions
You’ve got beautiful fillets. Now keep them that way. The golden window for cooling is within thirty minutes of the fish coming aboard. The ideal temperature is between 33 and 38 degrees Fahrenheit. Below freezing starts to crystalize the meat and ruin the texture. Above 40 degrees, bacteria start to multiply quickly.
Slush ice is the best option for short trips. It’s simply crushed or flake ice mixed with a little seawater. The water helps the ice conform around the fillets, cooling them faster than ice cubes alone. Drain the water every few hours and add fresh ice. A cooler with a drain plug makes this easy.
Ice packs are cleaner and less messy than loose ice. They last longer, don’t melt into water that dilutes flavor, and are easy to pack. Brands like Yeti Ice or Engel make heavy-duty versions that stay cold for over 24 hours. The downside is they don’t conform to fillets as well as loose ice. Use a combination of ice packs and a small amount of loose ice for best results.
Dedicated fish coolers with a drain system are the gold standard. A cooler like the Yeti Tundra or Pelican 50QT has excellent insulation and a drain plug that lets you remove water without opening the lid. This maintains the temperature. For serious spearfishers, a portable 12-volt freezer, like an ARB or Dometic model, is a standout. It keeps fillets at a precise temperature, even in direct sun, and doesn’t require ice. The tradeoff is cost and power draw on your boat’s battery. Travelers who need a reliable option for day trips may prefer an insulated rotomolded cooler with a drain plug for easy ice water management.
Best for day trips: A rotomolded cooler with slush ice and a drain plug. Best for multi-day trips: A 12-volt freezer. Best for budget: A high-quality soft-sided cooler with gel ice packs.
Whichever option you choose, keep the cooler in the shade. Even the best insulation can’t fight direct sun for hours. And always pre-chill the cooler the night before.
Cleaning Fish in Rough Weather: Tips for Stability
Spearfishing often happens in less-than-perfect conditions. A flat sea is a luxury. Most of the time, you’re working in a chop that makes every cut a balancing act. Cleaning fish after spearfishing in rough weather is a skill on its own.
First, position yourself. Sit down if possible. Kneel on a non-slip pad or a folded towel. Your center of gravity is lower, and you can brace yourself against a seat or the gunwale. Plant your feet wide and keep your knees bent. Do not stand with your legs locked. A sudden roll will throw you off balance.
Second, secure your cutting board. A board with a clamp or a lip that hooks over the edge of the boat is invaluable. If your board doesn’t have that, place a non-slip mat or a damp towel under it. Hold the board down with one hand while you cut with the other.
Third, slow down. In rough weather, the temptation is to rush to get it over with. That’s when knives slip. Take your time. Make deliberate, controlled cuts. If you feel the boat lurch, stop cutting and brace for the motion. Wait a second. Then continue. A slightly slower but safe fillet is better than a fast one that ends with a trip to the ER.
Finally, keep your knife tip pointed away from your body at all times. In rough conditions, the knife can bounce. Maintain a firm grip. A knife with a textured handle, like a rubberized grip, helps you hold on when your hands are wet and the boat is moving. If you have to, set the knife down completely and wait for a lull in the waves.
This isn’t a suggestion. It’s a survival tip. I’ve seen experienced divers lose a finger because they thought they could power through a rolling sea. Don’t test your luck.

Ready to Get Started? Find Your Options Here
Cleaning fish after spearfishing is a skill that improves with every trip. what matters is to bleed immediately, gut efficiently, and chill aggressively. The right gear makes the difference between a frustrating chore and a smooth process that ends with perfect fillets waiting for the grill or the cooler.
You don’t need a $500 knife or a massive cooler to start. You need a sharp blade, a stable cutting surface, and a system that works for your boat and your style. Start with the basics I covered here, and build from there.
If you’re ready to upgrade your setup or put together your first boat cleaning kit, click here to browse recommended gear—including knives, boards, gloves, and coolers that I’ve used and trust on my own boat. Everything linked has been tested in real conditions, not just in a product catalog. Get the tools that match your commitment to bringing home the best possible catch.