Essential Spearfishing Knives: Why You Should Never Dive Without One
Introduction
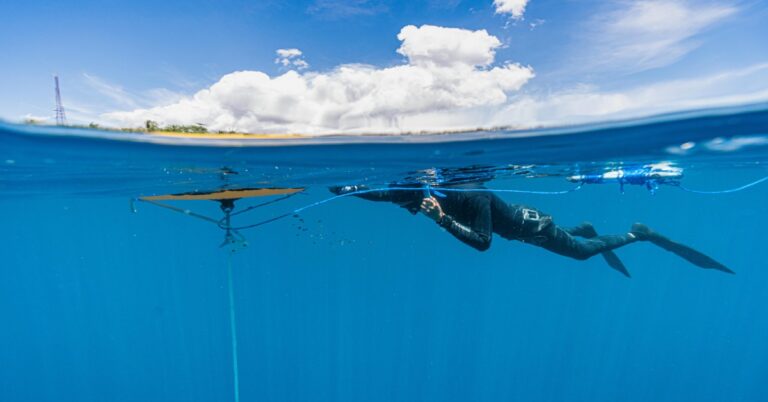
There are two kinds of spearfishers: those who have been tangled up underwater, and those who will be. It might be a stray monofilament line, a loop of kelp, a lost fishing net, or the shooting line from your own gun. In that moment, a knife isn’t a piece of gear. It’s your way out. This is why the best spearfishing knives are not a luxury; they are a essential piece of safety equipment.
But a spearfishing knife isn’t just for emergencies. You will use it for humane fish dispatch, prying abalone off rocks, cutting bait, and slicing through stubborn plastic strapping on a crate of frozen squid. It serves a dual role as a safety tool and a utility knife. For anyone new to the sport, or an experienced diver looking to upgrade, this article will break down the essential features, the types of knives available, and how to choose one that fits your specific dive conditions.

Why a Knife Is Critical, Not Optional
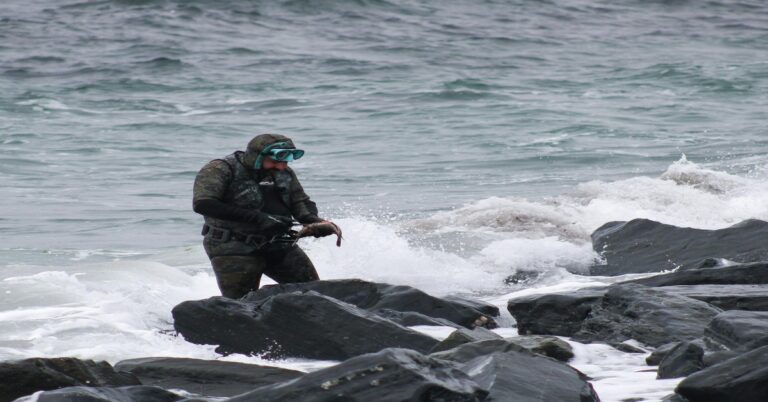
Going spearfishing without a knife is a gamble you will eventually lose. The ocean is full of entanglement hazards that can turn a good day into a life-or-death situation within seconds. A dive buddy of mine was freediving in kelp-heavy water off the California coast. He swam through a clear patch, but a large frond wrapped around his ankle, pulling him back as he surfaced. He had his knife on his calf, cut the kelp cleanly in one motion, and ascended without issue. Without it, he would have had a serious problem.
A diver who wants to be prepared for such situations should carry a reliable blade. Those looking for their first knife may want to start by exploring spearfishing knives designed specifically for saltwater use.
The three core reasons to always carry a knife are simple, and they matter to every diver regardless of experience level.
- Entanglement safety: Monofilament line, discarded fishing nets, kelp, rope from moorings. Your hands are virtually useless underwater against a braided line under tension. A sharp blade is the only reliable solution.
- Humane dispatch: A quick, precise cut to the brain or gills is the most humane way to kill a speared fish. Flailing fish are dangerous to you, your gear, and the reef.
- Utility tasks: Prying open scallops, cutting bait, slicing through cable ties, or cutting a tag off a new wetsuit. The knife becomes an extension of your hand.
A knife in the water is not a tool you hope to use. It is a piece of life insurance that is always ready. Never think of it as optional.
Anatomy of a Spearfishing Knife: What to Look For
Understanding the components of a spearfishing knife will help you cut through the marketing and pick the right tool. Every part has a tradeoff, and knowing them is what separates a smart purchase from a regretful one.
Blade Material
The blade is the heart of the knife. The three most common materials are stainless steel, titanium, and H1 steel. Stainless steel is affordable and holds an edge well, but it rusts in saltwater without diligent care. Titanium is nearly immune to corrosion, lightweight, and strong, but it does not hold an edge as long as good stainless steel. H1 steel is a nitrogen-based alloy that resists rust even better than titanium in some cases and takes a sharper edge. The tradeoff is cost and availability. For the average diver, a good 420 stainless or an H1 blade is the sweet spot. For the diver who hates maintenance, titanium is worth the extra money. A diver who prefers low-maintenance gear might consider browsing titanium dive knives for their corrosion resistance.
Blade Shape
Most spearfishing knives have either a pointed tip or a blunt tip. A pointed tip is versatile—it can pry, poke, and make precise cuts. But it can also stab you or your gear if it slips. A blunt tip is safer for self-defense cuts and line cutting, but it is less effective for prying or scraping.
Edge Type
You will see knives with straight edges, serrated edges, or combination edges. Straight edges are best for clean cuts, fillet work, and sharpening. Serrated edges excel at cutting through rope, line, and kelp but are difficult to sharpen in the field. A combo edge gives you the best of both worlds, but both edges are smaller and can be compromised. For most spearfishers, a straight edge with a small serrated notch near the handle is ideal.
Handle and Sheath
The handle should be ergonomic and textured for grip when wet. Look for rubber, plastic, or wrapped cord, not bare metal. The sheath is where many knives fail. It needs a secure retention system—either a positive locking mechanism or a friction fit with a secondary button or strap. The sheath should also have a breakaway design so it can release your knife if it snags on something. Avoid cheap plastic sheaths that rely purely on friction; they are the most common cause of lost knives. Finally, check local laws on blade length. Some areas limit blade length to 4 or 5 inches for concealed carry, though spearfishing knives are typically exempt as dive tools. Check your local regulations.
Pointed Tip vs. Blunt Tip: Which Is Better for Spearfishing?
This is one of the most common debates among spearfishers, and the answer depends on where you dive and what you do with your knife. There is no universal winner.
Pointed tip: A pointed tip gives you the ability to pierce, pry, and probe. It is excellent for tasks like shucking abalone, prying open rock oysters, or cutting the gills of a fish with precision. But it is also a liability. If you drop it or fumble it, the tip can stab into your leg, your wetsuit, or your gear. In an emergency where you are cutting yourself free from entanglement, a pointed tip can accidentally puncture something you don’t want punctured.
Blunt tip: A blunt tip is inherently safer. It is the preferred choice for line cutting and kelp cutting because it reduces the risk of injuring yourself. The tip is less likely to snag on a wetsuit or a float line. The downside is that it is not as effective for prying or scraping tasks. If you need to open a scallop or break a barnacle, a blunt tip is frustrating.
Situational advice: If you dive primarily in open water with minimal entanglement risks and need to shuck shellfish or dispatch fish cleanly, a pointed tip is a good choice. If you dive in kelp forests, near commercial fishing grounds, or anywhere with heavy line, a blunt tip is the safer, smarter option. For a new spearfisher, I always recommend starting with a blunt tip. You can always buy a second pointed knife later.

The Three Best Knife Placements on Your Body (and Why)
Where you mount your knife affects how fast you can access it, how likely it is to snag, and how comfortable it is. There are three standard placements, and each has a clear use case.
- Lower leg/calf strap: This is the most common placement for good reasons. It keeps the knife out of the way, reduces snagging on kelp or gear, and is easily accessible with either hand. You can reach down, grab the handle, and pull the knife free without looking. This is the best choice for most divers, especially beginners. Divers who want a quick mounting solution can look for a dive knife calf strap that fits securely over a wetsuit.
- Forearm: Mounting the knife on your forearm provides extremely fast access. It is ideal for dispatching fish because you can pull the knife and cut quickly without shifting your body position. The downside is that it is more likely to snag on kelp or a gun sling. It also gets in the way when you need to use both hands for something like loading a bands gun.
- Weight belt or chest harness: Some divers prefer to mount the knife on their weight belt or a chest harness for stability. It keeps the knife secure and accessible, but it can interfere with a quick weight belt release in an emergency. If you use this placement, ensure the knife and sheath are positioned so they do not block the weight belt buckle.
Common mistake: Choosing a mounting location that you cannot reach with your non-dominant hand. In an entanglement, you may not be able to use your dominant hand. Mount the knife where either hand can grab it. Also, test the placement while wearing a thick wetsuit or a drysuit to ensure you can still get a firm grip. Try a few dives with duct tape before committing to a permanent mount.
Blade Length: Short, Medium, or Long – What Works Where
Blade length is a balancing act between capability and manageability. Here’s a quick-reference guide.
- Short (3-4 inches): Excellent for line cutting and dispatch. It is easy to carry and unlikely to snag. But it is limited for prying or heavy-duty tasks. Best for the minimalist diver or someone who only needs a backup to a larger knife on the boat.
- Medium (5-7 inches): This is the sweet spot for the vast majority of spearfishers. A 5- to 6-inch blade handles almost every task, from cutting line to prying abalone. It is still manageable and comfortable to carry on your calf. This is what I recommend for 90% of divers.
- Long (8+ inches): Useful for deep prying, large fish dispatch, or as a thrusting tool. But it is cumbersome, can get in the way, and is illegal in some jurisdictions. Only choose this length if you have a specific need, like prying large abalone off rocks in strong surge.
The strong recommendation: Most spearfishers are best served by a 5- to 6-inch blade. It offers the best balance of utility and carry ease. Always check local laws regarding blade length before buying a long knife.
The Hidden Danger: Sheath Failures and How to Avoid Them
Most divers focus on the blade, but the sheath is the part that will either save you or betray you. A sheathed knife is useless. A lost knife is a hazard. Sheath failures are more common than most people think.
The primary risk is that the knife falls out of the sheath without you noticing. This usually happens when the retention mechanism weakens over time, or when the sheath gets bumped against a rock or a boat hull. Once the knife is loose, it can stab your wetsuit, your float line, or your dive buddy. Worse, you may not realize it is missing until you need it.
Another common failure point is the retention screw or strap that holds the knife to your leg or arm. If that breaks, the entire assembly (sheath and knife) can float away. This happens more often than you’d think with cheap plastic sheaths.
How to avoid this: Choose a sheath with a positive locking mechanism, not just friction. A spring-loaded button or a rotating lock is far more reliable than a simple friction fit. Also, look for a sheath that has a lanyard hole. You can attach a short loop of bungee cord to the knife and the sheath, so even if the knife falls out, it stays attached. Finally, always rinse and inspect your sheath after every dive. Salt buildup can cause springs to corrode and retention to fail.
Serrated, Straight, or Both? Matching Edge to Task
The edge of your blade determines what it does best. Here’s the breakdown.
- Serrated edge: The teeth grip and saw through fibrous material better than a straight edge. It is ideal for cutting rope, monofilament line, kelp, and netting. The downside is that it is difficult to sharpen in the field. You need a specialized file or a serrated-edge sharpener. If you dive in areas with heavy fishing line or commercial gear, prioritize a serrated segment.
- Straight edge: A straight edge is far easier to sharpen to a razor finish. It is better for precision cuts, filleting fish, and shucking shellfish. It is also more effective for thrusting or prying because the edge does not catch. However, it can slip on wet, fibrous material.
- Combo edge: Many of the best knives have a few inches of serrated edge near the handle and straight edge toward the tip. This is the most versatile option. You use the serrated part for line and kelp cutting, and the straight part for precision tasks. The tradeoff is that each edge is shorter, and you must maintain two different sharpening techniques.
Recommendation: If you dive in kelp-heavy water or near piers and jetties with lots of fishing line, prioritize a knife with a serrated segment (combo edge). For general use, a straight edge with a small serrated notch near the handle is the most practical. Avoid full-serrated blades unless you have a specific need and are willing to sharpen them.

Three Common Knife Mistakes Beginners Make (and How to Fix Them)
I’ve seen divers make the same three mistakes over and over. Avoiding them will save you money, frustration, and potential danger.
Mistake 1: Buying a cheap knife that rusts after a few saltwater dives.
The allure of a $20 knife is strong. But cheap stainless steel (like 3Cr13 or low-grade 420) will start corroding after a few saltwater dives if not rinsed immediately. Pitting rust on the blade edge makes the knife dangerous and useless.
Fix: Spend at least $40-60 on a knife with a known corrosion-resistant steel (like 420HC, 8Cr13MoV, or H1). If you can’t afford that, be religious about rinsing and drying. Better yet, save up and buy a quality knife that will last years.
Mistake 2: Carrying the knife in a pocket or on the back of the belt where it can’t be reached.
I’ve seen divers clip a knife to their weight belt on the small of their back. Good luck reaching that when you are tangled in kelp or have a fish thrashing at your waist. Slow access defeats the entire purpose of a knife.
Fix: Mount the knife on your calf, forearm, or the front of your weight belt. You must be able to grab it with either hand without looking or contorting your body. Test it in the water before you need it.
Mistake 3: Not rinsing and oiling the knife after every dive.
Saltwater is incredibly corrosive. A knife left wet after a dive will start to rust within hours, even on high-end stainless steel. Rust on the locking mechanism can cause the knife to stay stuck in the sheath or not lock at all.
Fix: Rinse your knife and sheath with fresh water immediately after every dive. Dry it with a towel. Apply a light coat of mineral oil or silicone spray to the blade, the pivot, and the locking mechanism. This takes 30 seconds and will extend the life of any knife dramatically. A diver who wants to maintain their gear might pick up a dive knife maintenance oil for routine care.
How to Maintain Your Spearfishing Knife for Years of Service
Good maintenance is cheap. Bad maintenance leads to a rusty, dull, or broken knife. Here is a simple routine that works.
- Rinse: After every dive, rinse the knife and sheath thoroughly with fresh water. Pay attention to the sheath slot where salt can get trapped.
- Dry: Pat the knife dry with a towel. Let the sheath air dry completely.
- Lube: Apply a few drops of mineral oil or silicone lube to the pivot point of any folding knives (most spearfishing knives are fixed blade, but some have a locking mechanism). Also, apply a thin coat to the blade itself. This prevents rust and keeps the edge protected.
- Sharpen: A dull knife is dangerous because it requires more force, increasing the chance of slipping. Use a diamond stone or a ceramic rod to maintain the edge. For a straight edge, use a consistent angle (about 15-20 degrees). For serrated edges, run the sharpening rod through each serration. Do this every few dives, depending on how much you use the knife.
- Inspect sheath: Check the sheath for cracks, worn retention clips, or loose screws. Replace or repair any broken parts immediately.
The cost-benefit is clear: a $60 knife that you maintain well will outlast a $150 knife that is neglected. The time investment is minimal—10 minutes after each dive and 15 minutes for sharpening once a month.
Quick Reference: What to Look for When Buying Your First Spearfishing Knife
If you are in a hurry, here is the TL;DR checklist. These seven criteria will guide you to a solid, reliable knife that matches most beginners’ needs.
- Blade material: Titanium or H1 for corrosion resistance; otherwise, high-grade stainless like 420HC or 8Cr13MoV.
- Blade length: 5-7 inches for the best all-around utility.
- Tip type: Blunt tip for new divers—safer for emergency line cutting.
- Edge type: Combo edge (serrated near handle, straight near tip) for versatility.
- Sheath: Locking mechanism (button or rotating lock) with a breakaway design. Avoid pure friction sheaths.
- Placement: Calf strap mount for ease of access and low snag risk.
- Budget: $50-120 is the sweet spot for a reliable, maintenance-friendly knife.
This checklist cuts through the noise. Use it when you browse gear retailers.
Ready to Choose Your Knife? Start with Safety
The best spearfishing knife is not the flashiest or the most expensive. It is the one that fits your body, your dive environment, and your habits. It should be comfortable to wear, easy to access, and reliable when you need it most. A knife that sits on your belt unused is just dead weight. A knife that is always on your calf, sharp and secure, is the difference between a close call and a bad day.
Before you buy, think about where you dive. If it is kelp-heavy, go blunt tip. If you need to shuck shellfish, go pointed. And never, ever dive without one. The next time you are gearing up, take a moment to strap that knife on. It might be the most important piece of gear you carry.
Now that you know what matters, go research specific models. Compare blade materials, check sheath designs, and read reviews from divers who use them in conditions similar to yours. The best spearfishing knife is out there, waiting for you to find it.