Spearfishing in New Zealand: Complete Guide to Targeting Huge Kingfish
Introduction
Spearfishing in New Zealand lands on the short list for divers who want a shot at trophy kingfish. I’ve spent several seasons hunting these fish along North Island reefs, and the experience is as challenging as it is rewarding. This guide comes from those dives, not from a tourism brochure. If you’re a spearo researching a trip, you want practical, honest advice about locations, gear, tactics, and planning. That’s what this is. I’ll cover the realities of water temperatures, currents, and what it actually takes to land a big king. No fluff, just what you need to know for a successful trip.
Chasing New Zealand kingfish taught me humility. These fish don’t give second chances.

Why New Zealand for Kingfish? A Realistic Overview
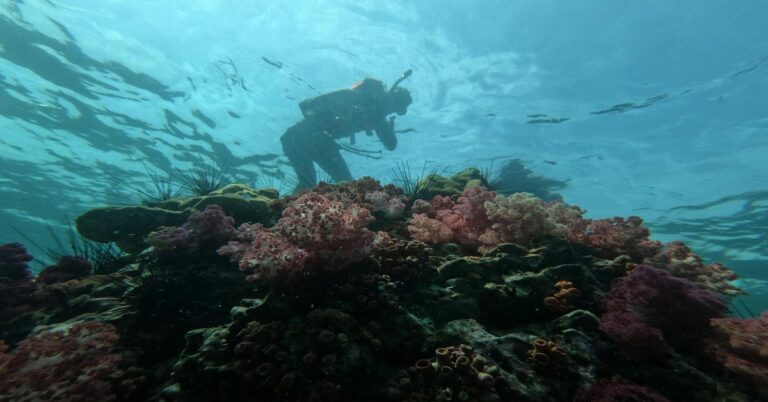
New Zealand delivers on size. Kingfish here regularly run 20 to 40 kilograms, and fish pushing 50 kilos are taken every season. Water clarity in many areas—especially around offshore islands and pinnacles—is exceptional, often exceeding 25 meters on a good day. That clarity is exactly what makes the hunting addictive: you see your target early, but so does it see you. The structure is also world-class, with massive kelp forests, steep drop-offs, and rocky points that hold fish year-round.
Let’s be honest about the challenges though. The water is cold. Even in summer, surface temps rarely climb above 20°C, and thermoclines can drop you into 12°C water at 15 meters. Strong tidal currents are common, especially in channels between islands. You need solid fitness and good dive skills—this isn’t a spot for absolute beginners unfamiliar with current management. The best regions for kingfish are Northland (from the Bay of Islands up to Cape Reinga), the East Cape, and the islands off the Coromandel. Each has its own character, but all demand respect for the conditions.
When to Go: Seasonal Timing and Weather Windows
The prime season runs from December through March. That’s your summer window. During these months, water temperatures sit between 18°C and 20°C in the north, and visibility peaks. Kingfish become more active, feeding aggressively before the spawning period. If you can only travel during this time, you’re choosing the best odds for consistent conditions.
Weather matters just as much as the calendar. New Zealand’s prevailing westerlies can kick up a southwest swell that makes offshore reefs inaccessible for days. You need patience and a flexible schedule. A two-week trip often only yields six or seven genuinely fishable days. Winter (June to August) is for hardcore divers who don’t mind 12°C water and limited visibility, but it’s not recommended for a first-time trip. Your gear choice must account for these temperatures—a 5mm wetsuit is the absolute minimum, and many experienced divers wear 7mm open-cell suits to stay warm through multiple dives.
Essential Gear for New Zealand Kingfish Spearfishing
Your gear list for New Zealand is different from a tropical trip. Here’s what I’ve found essential after many dives:
- Wetsuit: 5mm minimum, but 7mm open-cell is much better for those long sessions. Open-cell suits are warmer but require a lubricant to put on. A good closed-cell 7mm like an Elios or Picasso is a solid alternative if you dislike the hassle. Anyone expecting cold water should consider a quality 7mm spearfishing wetsuit for reliable warmth.
- Speargun: For kingfish, you want power. A 90 to 110cm railgun with a single 16mm or 18mm band is a good starting point. For deeper water or larger fish, a 120cm with two bands gives you reach and penetration. A roller gun also works well. Recommendation: Salvimar or Pathos make reliable, accurate railguns.
- Float and Float Line: Critical for safety and fish recovery. A large inflatable float (at least 25kg buoyancy) with a strong 10-meter line keeps your catch visible and stops you getting pulled down. A slip tip on your spear is essential—kingfish have bony mouths and a flopper alone won’t hold. A reel can help, but a well-set float line is more reliable.
- Dive Knife and Torch: A sharp knife is vital for cutting kelp or line in an emergency. A small torch helps in low-visibility water or dark kelp edges.
- Weight Belt: Start with 4–6kg of lead, but adjust for your suit thickness and body composition. Too much weight makes you cold and burns energy.
Invest in quality. Cheap gear fails when the current picks up or the fish fights hard. I’ve seen guns misfire and floats pop on big fish. Your safety depends on reliable equipment.

Top North Island Locations for Targeting Kingfish
Here are three locations that consistently produce, each with a different character:
Poor Knights Islands
Accessible only by boat, typically from Tutukaka. The Poor Knights are a marine reserve and a fantastic hunting ground. Visibility is often over 30 meters, and the kingfish are large and curious. This is an intermediate-to-advanced spot due to the currents and depth (20–40 meters). Schools hold around pinnacles and ledges. Charter operators from Tutukaka run daily trips. If you have a boat, the launch at Tutukaka is well-maintained.
Cape Brett
About a 45-minute boat run from Russell or Paihia. Cape Brett has a striking peninsula with steep drop-offs and caves. Kingfish here are often seen cruising the edges in 15–25 meters of water. The current can rip through the channel, so plan your dive around slack tide. This is a good spot for experienced divers; beginners should stick closer to sheltered bays.
Mokohinau Islands
Further offshore (around 50km northeast of Auckland), these islands are more exposed and require a bigger boat and good weather window. The reward is huge kingfish and uncrowded waters. Vis is usually good, but the swell can be significant. Only experienced boat handlers should attempt this. There are no facilities on the islands—you’re self-sufficient out here.
For a first-time trip to New Zealand, I’d recommend starting with a charter to the Poor Knights. It gives you the best chance at a big fish without the stress of logistics.
Tactics That Work: Hunting the New Zealand Kingfish
Kingfish aren’t easy. They’re smart, fast, and have excellent vision. Here’s what I’ve learned works:
Read the structure. Kingfish relate to points—places where the bottom rises sharply, creating a “pin.” A point that juts into a current is a prime ambush spot. Look for pinnacles or small bomboras that drop off into deep water. Fish will cruise along the edge, scanning for bait. If you see a school of baitfish (like kahawai or john dory), kingfish are likely nearby.
Stealth is everything. Approach from with the current if possible, so your bubbles and silhouette don’t give you away. Dive down vertically or at a shallow angle, not directly above the fish. Breath-hold discipline matters here—a smooth, quiet entry is better than a splash. Don’t kick hard on the surface; glide down and use your hands to steer.
Two strategies: ambush and cruise. The ambush method works best on a well-known point. Position yourself on the bottom (at 12–18 meters) behind a rock or weed, and wait. This requires good breath-hold and patience. The cruising method involves swimming slowly along a drop-off at 10–15 meters, scanning for fish moving through. Both have their place. On a new spot, I’ll usually cruise first to locate fish, then ambush once I know their pattern.
Shot placement. Kingfish have a very tough skull. The best shot is high on the shoulder, just behind the gill plate. This hits the spine and ends the fight quickly. Avoid shooting into the head—it can glance off. A slip tip is essential; a standard flopper can pull out if the fish goes deep. After the shot, keep the line tight and fight the fish from the float. Don’t try to haul it up by hand—big kings can drag you down.
Common mistake: Shooting too early. A kingfish often turns at the last second. Wait until you’re sure of the angle and distance. Patience lands more fish.
Charter vs DIY: Pros, Cons, and Recommendations
This is the biggest decision for your trip. Here’s a clear breakdown:
Charter:
Pros: You get local knowledge on where the fish are holding. The skipper knows the tides, currents, and hazards. Most charters provide gear (guns, floats, wetsuits) if needed. Safety is handled. Cost is fixed per person, usually NZ$350–$500 for a full day.
Cons: You’re on their schedule, not yours. You dive with a group, which can be crowded. If conditions are bad, the trip might cancel.
DIY:
Pros: Full flexibility—dive exactly where and when you want. Lower cost per dive if you have a boat or can access shore spots. You control the pace.
Cons: You need to own or rent a boat (big expense). You must understand local conditions and hazards yourself. Gear investment is high if you don’t already own it. Beginners can get into trouble quickly.
Best for first-timers: Take a charter. The education alone is worth the cost. For experienced spearos with their own boat and NZ knowledge, DIY is rewarding.
Common Mistakes Spearfishers Make in New Zealand
I’ve seen these mistakes repeat year after year. Avoid them:
- Underestimating thermoclines. The water can drop from 18°C to 12°C in a matter of meters. Divers without enough suit thickness get very cold, very fast. This leads to shivering, poor breathing, and early exit. Wear a 7mm suit or a 5mm with a vest.
- Not checking tides and currents. A rising tide pushing into a point creates the best visibility, but the current can be strong. Always check the tide table for the specific location. Diving a channel at full flood on a spring tide is a recipe for drifting miles offshore.
- Using too small a gun. A 75cm gun works for snapper, but it’s not enough for a big kingfish. You need a 100cm minimum for effective penetration at range. A 90cm can work if you’re very close, but don’t handicap yourself. A reliable 110cm or longer speargun will give you the range and power needed.
- Chasing fish in bad weather. That flat forecast might change by midday. NZ weather is notoriously fickle. If the swell is forecast to rise, stay inshore. A day in the water isn’t worth a trip to the emergency room.
Safety Essentials for Kingfish Spearfishing in NZ
New Zealand’s remote reefs demand self-sufficiency. Here’s what prioritizes your safety:
- Buddy system. Always dive with a partner, especially on deeper drops. Agree on a plan before you get in. A surface lookout is useful.
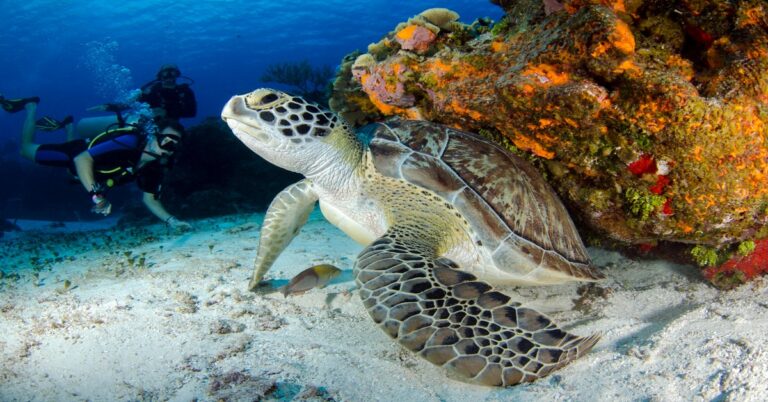
- Shark awareness. White pointers are present but rare. More common are bronze whalers and makos. If a shark shows interest, exit calmly and maintain eye contact. Don’t panic. A dive knife is good, but alertness is better.
- Boat traffic. Popular spots like the Poor Knights are busy in summer. Deploy a large bright float with a flag. Stay close to your buddy. Avoid diving in shipping channels.
- Line management. Keep your float line away from your body. A wrap around a fin or arm when a fish runs is dangerous. Use a breakaway system if possible.
- Safety gear: Carry a dive knife, a surface marker buoy (SMB), and a waterproof whistle. A dive computer is useful for tracking depth and time. Recommendation: A simple Suunto or Mares computer is reliable.
Flying with Your Spearfishing Gear: What You Need to Know
Traveling with spearfishing gear requires some planning. Here’s what I’ve learned:
- Gun case: A padded gun case is essential. Most airlines treat spearguns as sporting goods, not firearms. Check their policy. A 120cm gun will fit into most roller bags. Declare it at check-in if asked.
- Weight restrictions: Airlines have strict baggage weight limits (typically 23kg per bag). Weight plates are heavy. My advice: bring only your essentials—wetsuit, mask, fins, and gun. Buy lead weights locally at a dive shop. It’s cheaper and saves your back.
- Batteries: Lithium batteries for torches or cameras must be in carry-on luggage. Check the airline’s policy on spare batteries. Some restrict them.
- Best airlines: Air New Zealand is reliable for sporting gear. Emirates and Qantas are flexible. Always call ahead to confirm policy and fees.
Accommodation and Camping Options Near Key Spots
Where you stay matters for logistics. Here’s what works:
Holiday Parks (e.g., Top 10 Holiday Parks): These are common in places like Paihia, Russell, and Whangarei. They offer cabins or campsites with boat parking. Good if you’re driving and have gear. Book ahead in summer.
Basic Motels: Small towns like Opua or Rawhiti have basic motels. They’re not luxury but are close to boat ramps. Expect a kitchenette and parking.
Baches (NZ holiday homes): Renting a bach is popular. Websites like Bookabach list properties near key spots. These work well for a group, offering space and storage. For the Bay of Islands, look around Kerikeri or Paihia.
Camping: Freedom camping is restricted in many areas. Use designated campgrounds, especially near the Poor Knights (Tutukaka has a small holiday park). Fires are often banned in summer—check local rules.
Book well ahead if traveling in January or February. Accommodation fills fast.

Final Checklist and Quick Summary
To get the most out of your trip, here’s a concise summary:
- Best time: December to March.
- Top location for beginners: Poor Knights Islands via charter from Tutukaka.
- Critical gear: 7mm wetsuit, 100-120cm railgun, slip tip, large float, dive knife.
- One key tactic: Wait for the shot—patience saves missed opportunities.
Now it’s time to move from research to booking. Check rates for a charter in the Bay of Islands or book your gear rental before you go. The water is waiting.