The Physics of Spearfishing: Drag, Range, and Power
Introduction
You’re thirty minutes from shore, the boat is bobbing, and you’ve just snagged your hand on a reef or brushed against something gelatinous that now burns like a brand. There’s no ER waiting room out here. That’s why understanding a practical spearfishing first aid guide isn’t just a good idea—it’s a requirement for anyone serious about the sport.
After years in the water, I’ve learned that the gap between struggling and thriving often comes down to the small things.
I’ve tested enough gear to know that the best equipment doesn’t always have the highest price tag.
I’ve hunted enough locations to know that local knowledge beats generic advice every single time.
I’ve made enough mistakes in the water to know what actually works — and what just sounds good on paper.
I’ve made enough mistakes in the water to know what actually works — and what just sounds good on paper.
After years in the water, I’ve learned that the gap between struggling and thriving often comes down to the small things.
I’ve made enough mistakes in the water to know what actually works — and what just sounds good on paper.
I’ve tested enough gear to know that the best equipment doesn’t always have the highest price tag.
I’ve tested enough gear to know that the best equipment doesn’t always have the highest price tag.
After years in the water, I’ve learned that the gap between struggling and thriving often comes down to the small things.
I’ve made enough mistakes in the water to know what actually works — and what just sounds good on paper.
After years in the water, I’ve learned that the gap between struggling and thriving often comes down to the small things.
I’ve tested enough gear to know that the best equipment doesn’t always have the highest price tag.
I’ve hunted enough locations to know that local knowledge beats generic advice every single time.
After years in the water, I’ve learned that the gap between struggling and thriving often comes down to the small things.
After years in the water, I’ve learned that the gap between struggling and thriving often comes down to the small things.
I’ve made enough mistakes in the water to know what actually works — and what just sounds good on paper.
I’ve tested enough gear to know that the best equipment doesn’t always have the highest price tag.
I’ve tested enough gear to know that the best equipment doesn’t always have the highest price tag.
I’ve made enough mistakes in the water to know what actually works — and what just sounds good on paper.
I’ve made enough mistakes in the water to know what actually works — and what just sounds good on paper.
I’ve made enough mistakes in the water to know what actually works — and what just sounds good on paper.
I’ve hunted enough locations to know that local knowledge beats generic advice every single time.
I’ve tested enough gear to know that the best equipment doesn’t always have the highest price tag.
I’ve made enough mistakes in the water to know what actually works — and what just sounds good on paper.
I’ve made enough mistakes in the water to know what actually works — and what just sounds good on paper.
I’ve made enough mistakes in the water to know what actually works — and what just sounds good on paper.
I’ve made enough mistakes in the water to know what actually works — and what just sounds good on paper.
I’ve tested enough gear to know that the best equipment doesn’t always have the highest price tag.
I’ve tested enough gear to know that the best equipment doesn’t always have the highest price tag.
I’ve tested enough gear to know that the best equipment doesn’t always have the highest price tag.
I’ve hunted enough locations to know that local knowledge beats generic advice every single time.
I’ve tested enough gear to know that the best equipment doesn’t always have the highest price tag.
I’ve tested enough gear to know that the best equipment doesn’t always have the highest price tag.
After years in the water, I’ve learned that the gap between struggling and thriving often comes down to the small things.
I’ve tested enough gear to know that the best equipment doesn’t always have the highest price tag.
I’ve learned safety lessons the hard way — and the best ones stick with you for life.
Pushing deeper changed everything about how I approach spearfishing — and how I prepare.
I’ve made enough mistakes in the water to know what actually works — and what just sounds good on paper.
I’ve made enough mistakes in the water to know what actually works — and what just sounds good on paper.
I’ve learned safety lessons the hard way — and the best ones stick with you for life.
I’ve tested enough gear to know that the best equipment doesn’t always have the highest price tag.
I’ve made enough mistakes in the water to know what actually works — and what just sounds good on paper.
I’ve tested enough gear to know that the best equipment doesn’t always have the highest price tag.
After years in the water, I’ve learned that the gap between struggling and thriving often comes down to the small things.
I’ve made enough mistakes in the water to know what actually works — and what just sounds good on paper.
I’ve hunted enough locations to know that local knowledge beats generic advice every single time.
I’ve made enough mistakes in the water to know what actually works — and what just sounds good on paper.
After years in the water, I’ve learned that the gap between struggling and thriving often comes down to the small things.
After years in the water, I’ve learned that the gap between struggling and thriving often comes down to the small things.
After years in the water, I’ve learned that the gap between struggling and thriving often comes down to the small things.
Pushing deeper changed everything about how I approach spearfishing — and how I prepare.
I’ve made enough mistakes in the water to know what actually works — and what just sounds good on paper.
I’ve hunted enough locations to know that local knowledge beats generic advice every single time.
I’ve made enough mistakes in the water to know what actually works — and what just sounds good on paper.
This article covers the most common injuries you’ll actually encounter, from jellyfish stings to cuts and puncture wounds. I’ve been diving for years and have patched myself and my buddies up on plenty of occasions. The advice here comes from real experience, not just a medical textbook. You’ll learn what to carry, how to treat injuries on the spot, and when to call it and get professional help.

Why Every Spearfisher Needs a First Aid Plan
Spearfishing is physically demanding and often takes place in remote locations. An injury that would be a minor inconvenience in the parking lot can become a serious problem when you’re miles offshore. Cuts, stings, and strains are not ifs but whens. Being prepared means you don’t panic. You know exactly what to do, which keeps you and your dive buddies safe.
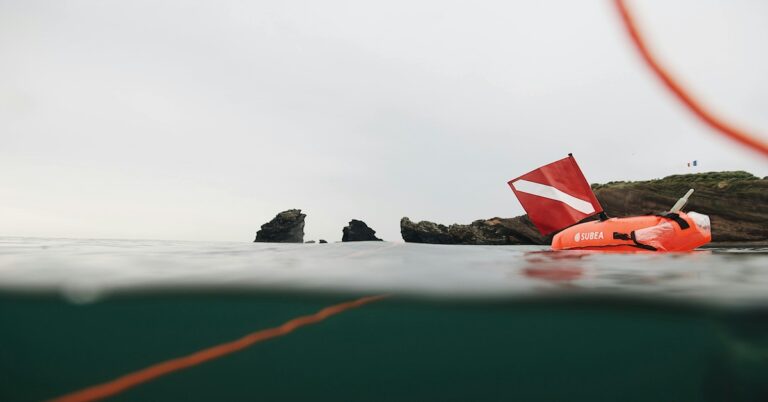
There is a tradeoff between carrying a comprehensive first aid kit and traveling light. A bulky kit can be a pain to stow on a kayak or in a small bag on a boat. But being underprepared can lead to infections, prolonged pain, or even a dangerous situation. I’ve found a happy medium: a compact, waterproof pouch with the essentials—antiseptic, gauze, tape, and sting treatment—is essential. A few extra ounces of gear can save you a ruined trip or worse. what matters is preparation, not paranoia. Know your kit, know your limits, and know when to use them.
The Essential Spearfishing First Aid Kit: What to Pack and Why
Building the right spearfishing first aid kit requires balancing weight, space, and usefulness. Here’s what I carry and use regularly, organized by necessity.
The Minimalist Kit (For Day Trips)
- Antiseptic wipes: To clean cuts and scrapes immediately. They kill a broad range of bacteria.
- Sterile gauze pads: For covering wounds and applying pressure.
- Medical tape: To secure gauze. Waterproof medical tape is best.
- Adhesive bandages (various sizes): For small cuts.
- Vinegar (small travel bottle): The most effective first-line treatment for most jellyfish stings.
- Tweezers: For removing splinters, small spines, or fish hooks.
- Antihistamines (e.g., Benadryl): For mild allergic reactions.
- Pain reliever (e.g., ibuprofen): For swelling and pain.
The Comprehensive Kit (For Longer Trips or Remote Locations)
- All items above, plus:
- Tourniquet: For severe bleeding only. Know how to use it properly.
- Sterile saline: For flushing wounds if fresh water isn’t available.
- Small forceps or hemostat: Better for deep hook or spine removal.
- Sting relief spray: A product like StingEze for immediate pain relief.
- CPR mask: In case of a medical emergency.
- Emergency blanket: For hypothermia.
- Sam splint: For suspected fractures or severe sprains.
Common Mistakes
- Using a non-waterproof container: Your kit will get wet. A dry bag or a waterproof Pelican case is essential.
- Not checking expiration dates: Antiseptics and medications lose effectiveness over time.
- Forgetting to restock after use: If you use a bandage, replace it immediately.
The minimalist kit works for a day’s dive from a boat where help is relatively close. The comprehensive kit is what I bring for any overnight trip, camping expedition, or dive more than an hour from a boat ramp. It’s a decision of risk tolerance and trip duration.
Treating Cuts and Lacerations While on the Water
Cuts from reef, fish spines, or boat hardware are the most common injuries you’ll deal with. The biggest fear isn’t bleeding—it’s infection. Marine bacteria are aggressive. A minor cut can turn into a nasty infection within 24 hours if not cleaned properly. Here’s my step-by-step process.
Step 1: Stop the Bleeding
Apply direct pressure with a clean gauze pad. Hold it for five minutes without peeking. Most small cuts will stop on their own. If it’s a deeper cut, keep pressure wrapped with a tight bandage.
Step 2: Clean the Wound
This is where a common mistake happens. Do not use fresh water from a bottle—it can push debris deeper and might not be sterile. Instead, use sterile saline from your kit or, if you have no other option, clean salt water. I prefer using antiseptic wipes once the bleeding has stopped. Gently wipe around the wound, moving outward from the center.
Step 3: Disinfect
Apply an antiseptic like iodine or hydrogen peroxide. Iodine is less harsh on tissue. Avoid pouring alcohol directly into a deep wound. It kills tissue cells and can actually slow healing. A little sting is normal; a burning sensation that lasts is a sign you’re using too much.
Step 4: Bandage
Cover the cut with a sterile adhesive bandage or a small gauze pad taped in place. Waterproof bandages work better than standard ones, but they still need to be changed once you’re out of the water. Keep the wound dry if possible.
When to Seek Medical Help
- The wound is deep enough that you can see fat or muscle.
- Bleeding won’t stop after 15 minutes of direct pressure.
- You have signs of infection (redness, spreading warmth, pus, fever).
- The wound was caused by something dirty or rusty (tetanus shot needed).
A compact wound care kit with pre-packaged sterile items is a smart addition to your gear. You want the ability to clean and bandage a cut properly without having to improvise with a t-shirt.

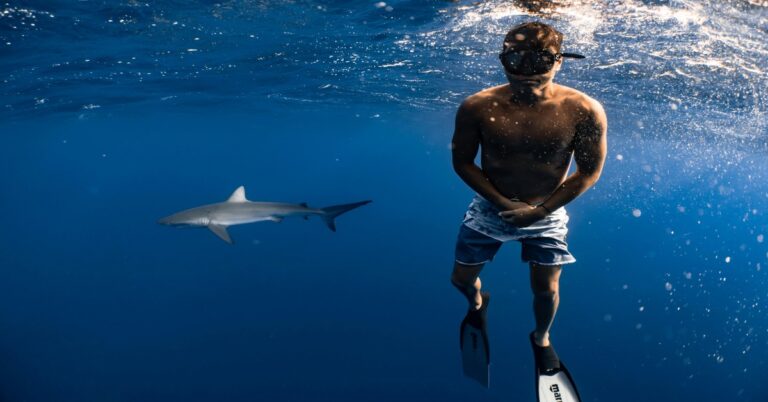
Jellyfish Stings: What Works and What Doesn’t
Jellyfish stings are painful, but most are not life-threatening. what matters is treating them correctly. There is a lot of bad advice out there. Here’s a clear protocol based on current medical guidance and my own experience.
The Protocol
- Get out of the water: You can’t treat a sting while floating. Secondary stings can occur if tentacles are still attached.
- Remove tentacles: Use tweezers, a gloved hand, or a thick stick. Do not use bare hands. Do not rub the area, which can fire more stingers.
- Apply vinegar: Soak a cloth or paper towel in household vinegar and apply it to the sting for 15–30 minutes. For most common jellyfish (like the Portuguese man o’ war or the sea nettle), this is the best treatment. It neutralizes the venom.
- Apply heat: If vinegar isn’t available, hot water (as hot as you can stand without burning) is a good alternative. The heat denatures the venom proteins. A hot shower or soaking the affected area works. Fresh water can also help here, but don’t pour it on aggressively.
- Monitor for allergic reaction: Watch for hives, swelling of the face or throat, or difficulty breathing.
What NOT to Do
- Do not pee on it: It’s a myth. Urine can actually make the sting worse.
- Do not use fresh water first: It can cause the stingers to fire more venom. Use salt water to rinse if you have nothing else.
- Do not use shaving cream or baking soda: These are not effective and can waste time.
When It’s Serious
Box jellyfish (found in the Indo-Pacific) and the Irukandji jellyfish (small but potent) can cause severe symptoms: intense pain, heart problems, or paralysis. If you are stung in areas where these exist, you need immediate medical evacuation. You cannot treat these at sea. For other jellyfish, the pain should subside within an hour. Sting relief sprays containing lidocaine can help with the residual sting, and I always carry a small bottle of vinegar in my kit for this exact reason.
Punctures and Stabs from Fish Spines or Debris
Lionfish spines, catfish barbs, and buried hooks are a different beast from a simple cut. The risk is both mechanical damage and venom injection. Here’s how to handle them.
Fish Spines (Lionfish, Catfish, etc.)
- Do not squeeze the wound: This is a common mistake. Squeezing can push venom deeper into the tissue.
- Remove the spine: If it’s visible and you can do so without tearing the skin, use tweezers or forceps. Pull straight out, not at an angle.
- Immerse in hot water: As hot as you can tolerate (around 110–113°F) for 30–90 minutes. This heat neutralizes the venom from most fish spines. It’s the same principle as a jellyfish sting with heat.
- Clean and bandage: Then follow the cut treatment steps.
Hooks (Your Own or a Friend’s)
If a hook gets embedded in you or a buddy, do not yank it out. This can cause more tissue damage. The best approach is the “push-through and cut” method: push the barb through the skin so it exits, then cut the barb off with wire cutters and remove the shank. This is painful but minimizes damage. If you’re not comfortable, leave the hook embedded, clean the area, and get to a doctor.
General Rule for Punctures
- Get a tetanus shot: If you haven’t had one in the last 10 years, you need one. Punctures from marine debris are high-risk for tetanus.
- Watch for signs of infection: Puncture wounds are deep and can trap bacteria. Redness, swelling, or pain that gets worse after a few hours is a red flag.
Carrying a small pair of forceps or a hook-out tool in your kit makes this job much easier. They’re cheap and effective.
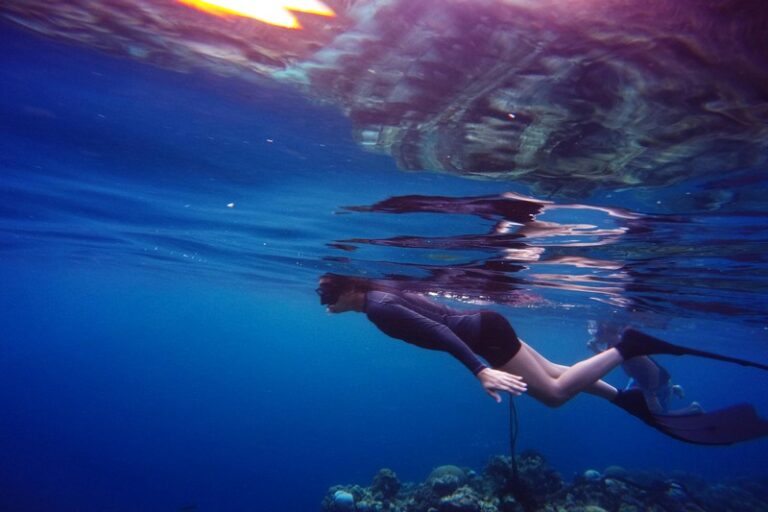
Barotrauma and Ear Injuries During Descents
Barotrauma happens when you can’t equalize the pressure in your ears, sinuses, or even your teeth during a rapid descent. It’s not always a dramatic event. You might feel a sharp pain, a feeling of fullness, or later notice some blood or fluid in your ear. It’s a common problem for spearos who push their depth limits.
Prevention is Key
Equalize early and often. The Valsalva maneuver (pinching your nose and blowing gently) is the basic technique. If you feel pain, stop descending. Do not force it. You can also try the Toynbee maneuver (swallowing while pinching your nose). If you have a cold or congestion, do not dive. The pressure changes will make it impossible to equalize and can cause serious injury.
First Aid for Mild Barotrauma
- Stop diving immediately. The moment you feel pain, abort the dive. Continuing will make it worse.
- Descend slowly (if you must) but stop at the first sign of pain.
- Rest. Your ear and sinus tissues need time to heal. A day or two off from diving is usually enough for mild cases.
- Use decongestants (after diving) if you have sinus congestion that contributed to the problem. But don’t dive while on them if they mask the inability to equalize.
When It’s Serious
If you have severe pain, hearing loss, vertigo (spinning sensation), or blood coming from your ear, you have a barotrauma that needs a doctor. A ruptured eardrum is painful and can take weeks to heal. Do not put anything in your ear to clean it. Just protect it from water and see a specialist. This is not something to tough out.
Understanding this risk builds real diving maturity. It’s not about being tough; it’s about knowing when to call a dive.

Managing Hypothermia and Exhaustion After a Long Dive
Hypothermia creeps up on you. You’re focused on the hunt, the water is cool, and you’re burning through your energy reserves. The first signs are not shivering or blue lips. It’s subtle: you start making poor decisions, feel clumsy, or get irritable. Your body is shutting down non-essential functions to conserve heat.
First Aid Steps
- Get out of the water. The loss of heat stops the moment you are in a dry, warm environment.
- Remove all wet gear. Your wetsuit, booties, and gloves are holding cold water against your skin.
- Warm up passively. Wrap yourself in a dry blanket, a towel, or a spare wetsuit. An emergency blanket is thin but reflects heat effectively.
- Drink warm fluids. Not alcohol—it dilates blood vessels and drops your core temperature further. Hot tea, coffee, or soup is great.
- Do not exercise to warm up: It can cause a dangerous temperature drop if you are severely hypothermic. Gentle movement in a warm environment is fine.
The Tradeoff: Continuing vs. Aborting
Once you start shivering, your body is losing heat faster than it can produce it. Shivering is an early sign of hypothermia. Continuing the dive because “I only have one more spot to check” is a poor risk-reward decision. By the time you realize you’re cold, you’re already behind. The dive is over. Accept it. The fish will be there tomorrow.
Having a warm layer and a heat pack in your boat bag is an investment that pays off. A simple chemical heat pack can be a lifesaver on a chilly day. Also, wear the appropriate wetsuit thickness for the water temperature. A 3mm suit in 65°F water is asking for trouble.
Allergic Reactions and Anaphylaxis: Quick Response Matters
An allergic reaction to a jellyfish sting, fish toxin, or insect bite can happen to anyone, even if you’ve never reacted before. You need to identify it fast. The signs are not always dramatic. You might see a rash spreading beyond the sting area, feel itchy all over, or notice your lips or eyelids swelling.
Mild to Moderate Allergic Reaction
- Symptoms: Localized swelling, hives, mild nausea, itching.
- Treatment: Take an antihistamine (diphenhydramine/Benadryl is the standard). Apply a cold pack to the area to reduce swelling. Monitor closely.
Anaphylaxis (Severe Allergic Reaction)
- Symptoms: Difficulty breathing, wheezing, swelling of the throat or tongue, dizziness, fainting, rapid heartbeat, vomiting, confusion.
- Treatment: This is a life-threatening emergency. You need epinephrine (EpiPen) immediately.
The Role of Epinephrine
If you or your dive buddy has a known allergy, you should carry an epinephrine auto-injector. It’s the only first-line treatment for anaphylaxis. Make sure someone in your group knows how to use it: remove the safety cap, press into the outer thigh (through clothing if necessary), and hold for 3-5 seconds. Then, call for emergency medical help. The effects of epinephrine are temporary (15-20 minutes), and you may need a second dose. Having a waterproof pouch for an EpiPen is also important. You don’t want it sitting in saltwater.
It’s a common mistake to dismiss a mild reaction as “just a sting.” Don’t. If you feel anything more than local pain and itching, treat it seriously. A compact antihistamine pack is a cheap, low-risk addition to any first-aid kit.
When to Evacuate and How to Signal for Help
This is the hard part. Knowing when self-care isn’t enough. Most of us want to tough it out, but that’s the wrong instinct. There are clear criteria that mean you need to leave the water and get professional help.
Clear Criteria for Evacuation
- Uncontrollable bleeding: You can’t stop it with 15 minutes of direct pressure.
- Loss of consciousness: Even if they come around, they need a medical evaluation.
- Severe allergic reaction: As described above. Anaphylaxis does not resolve on its own.
- Signs of infection: Red streaks, fever, or spreading warmth within 12 hours of a wound.
- Venomous bite or sting from a dangerous species: Box jellyfish, sea snake, cone snail.
- Suspected spinal injury: After a fall, boat impact, or strong wave tumble.
How to Signal for Help
You need more than shouting. A waterproof whistle is cheap and loud. A signal mirror can be seen for miles on a clear day. A personal locator beacon (PLB) or satellite messenger (like a Garmin inReach) is the most reliable way to call for help in remote areas. A cell phone in a waterproof case is useful near shore, but it’s not a substitute for a dedicated device. A dive knife can be used to bang on a tank or hull to make noise.
The Tradeoff: Stay vs. Go
If you’re not sure, you should probably go. The worst outcome is you waste a dive trip. The alternative is a worsening condition that becomes a rescue operation. Err on the side of safety. A PLB is an investment that gives you the ability to send an SOS from almost anywhere. Don’t leave home without one if you’re diving remote locations.
Common First Aid Mistakes Spearfishers Make
I’ve seen these mistakes happen more than a few times. Here’s a short list to help you avoid them.
- Using dirty water: Seawater off the boat or lake water is not sterile. It introduces bacteria. Use a sealed bottle of saline or bottled water.
- Ignoring small cuts: That tiny nick from a reef or a fin strap can become a serious infection. Clean and bandage it immediately, not later.
- Delaying treatment: “I’ll deal with it when I get back” is a dangerous phrase. The wound gets dirty, you get distracted, and the infection starts. Treat it on the spot.
- Not checking gear: A dull knife on a gut hook, a frayed line, or a cracked fin can lead to a cut. Pre-dive gear checks are part of safety.
- Putting a tourniquet on a non-life-threatening bleed: It can cause tissue damage and nerve injury. Only use it for severe, arterial bleeding that won’t stop.
- Forgetting to restock: You use a bandage in your kit, but never replace it. Next time you need it, it’s empty. Make restocking a habit.
These mistakes are all avoidable with a little discipline. Nobody is perfect, but being aware of them is the first step.
Building Your Skills: First Aid Courses and Resources
Reading this article is a great start. But nothing replaces hands-on training. A wilderness first aid course (like those offered by organizations like NOLS, Red Cross, or SOLO) teaches you how to assess a scene, treat injuries with limited gear, and make evacuation decisions. A dive-specific first aid course (like PADI’s Emergency First Response) covers underwater-related injuries and how to handle them in a marine environment.
These courses are not expensive and usually take two days. They give you confidence. You stop worrying about “what if” and start knowing what to do. The investment pays for itself the first time you use it. Consider taking a refresher course every few years to keep your skills sharp.