How to Rig Your Speargun Like a Pro
Introduction
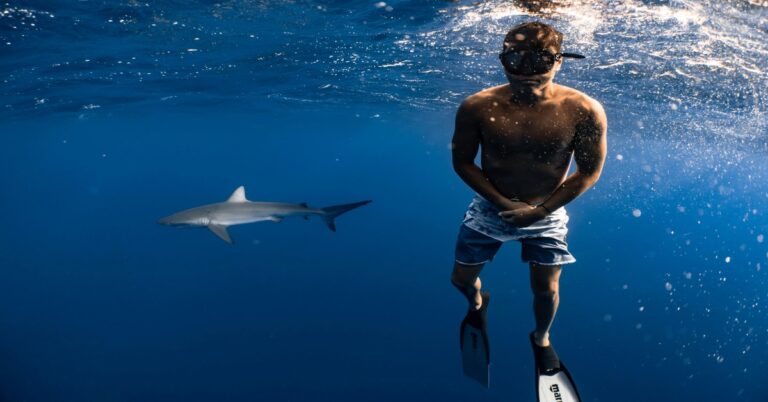
Every spearfisher remembers the first time a rig failed at depth. Mine happened on a twenty-foot pile near a reef drop-off. I aimed at a nice dogtooth, pulled the trigger, and heard a dull thud instead of a clean punch. The band had slipped off the wishbone. The fish swam away. I spent the rest of the dive frustrated, wondering what I did wrong.
That experience taught me something important: rigging is not just assembly. It’s a skill that directly affects accuracy, power, and safety. A poorly rigged gun might shoot low, lose range, or fail to engage when you need it most.
This speargun rigging guide covers everything from band selection to shaft setup to shooting line attachment. Whether you are assembling your first gun or dialing in a new build, the process matters. Rig it right the first time and you spend less time fixing problems and more time hunting.

Why Proper Rigging Matters
Rigging determines how your speargun performs underwater. Band length controls how much energy transfers to the shaft. The wishbone condition affects whether that energy releases cleanly. The shooting line setup influences how the shaft tracks through the water. If any of these elements are off, you lose accuracy, power, or penetration.
I once borrowed a friend’s gun for a deep reef dive. It looked well-maintained, but the bands were too long. The shaft barely made it to the target. I had to swim closer to hit anything, which spooked the fish. That dive taught me that even expensive gear can underperform if rigged incorrectly.
Safety is another reason to care. A poorly tied wishbone can snap during compression, sending rubber flying. A loose shooting line can tangle around your hand or the gun itself. Neither situation is just an inconvenience — both can cause real injury at depth.
Getting the setup right from the start means consistent shots, fewer lost fish, and less time troubleshooting. It also means you trust your gear. That trust lets you focus on reading the water and making good decisions.
Essential Tools and Parts for Rigging
Before you start, you need the right parts and tools. Trying to force a rig together with improvised gear leads to failures. Here is what you actually need:
- Bands — Core power source. Look for quality latex or rubber specifically rated for spearguns. Riffe and Neptonic make reliable options. Avoid hardware store rubber, it degrades fast in saltwater. Travelers who are still figuring out what tension they like may find a speargun band assortment helps them experiment without buying separate packs.
- Wishbones — Connect the bands to the shaft. Dyneema wishbones are popular for their strength and low stretch. Pre-tied rubber wishbones also work, but replace them regularly.
- Shaft — The projectile. Comes in various diameters and tip styles. Mori and Riffe shafts are common choices for their balance and durability.
- Shooting line — Attaches the shaft to the gun. Mono is standard, but some divers use dyneema for low-stretch performance. Bungee sections help with shock absorption.
- Crimps — Used to secure mono or dyneema connections. A speargun crimping tool makes a big difference. Cheap crimpers often mash rather than pinch, which weakens the connection.
- Swivels — Prevent line twist. Use high-quality ball bearing swivels for smooth rotation.
- Dyneema — For wishbones, line connections, and bridle loops. Buying a spool and tying your own saves money.
If you are new to rigging, consider a pre-rigged kit. Many brands sell complete band and line setups with pre-cut lengths and pre-tied wishbones. These take the guesswork out of your first build. You can find kits from Speardiver or Rob Allen that come with clear instructions.
Choosing the Right Band Setup
Band configuration determines how much power your gun delivers and how quickly you can reload. There is no single best setup, but there are smart choices for different situations.
Single band works well for smaller guns (under 90 cm) used in reef conditions. Reloading is fast, and the reduced power is enough for most reef fish. Single bands are also quieter, which helps in clear water where sound spooks fish.
Double bands provide more power, which helps on longer shots and larger fish. The tradeoff is slower reloading and slightly more recoil. Double bands work well on guns from 100 cm to 130 cm for blue water hunting or when you need penetration through thick hide.
Band length matters as much as the number of bands. A common formula is to cut bands to about 3.5 times the stretch length (distance from muzzle to notch). But this varies with band diameter and gun design. Too long and you lose power. Too short and you risk overstretching, which damages the bands and increases recoil.
If you are unsure, start with a medium-length band setup. Most manufacturers provide recommended lengths for their guns. Use those as a baseline and adjust from there. Riffe offers pre-cut bands that match their gun models, which simplifies the process.
How to Tie Bands and Wishbones
This is the step where many beginners go wrong. A poorly tied wishbone can slip or break under load. Here is a reliable method I have used for years:
Step 1: Cut your bands to length. Use a sharp blade and make a clean perpendicular cut. Stretch the band lightly before cutting to ensure the ends are relaxed.
Step 2: Insert the wishbone loop. If using dyneema wishbones, thread the loop through the band end and pull tight. The loop should sit about half an inch inside the band.
Step 3: Tie the wishbone knot. Wrap the dyneema around the band twice, then pass the tag end through the loop. Pull tight. Repeat for the other side.
Step 4: Attach bands to the muzzle. Use a figure-eight knot or a simple overhand knot on the muzzle pins. Ensure the band is seated evenly and not twisted.
Step 5: Test the connection. Stretch the band gently to confirm the wishbone holds. Apply moderate tension — not full draw — to check for slippage.
Dyneema wishbones generally last longer than rubber ones, but inspect them after every dive. Look for fraying near the knot. Replace immediately if you see damage. Rubber wishbones stretch over time and should be changed every few months depending on use.
Consistency matters. Tie each band the same way. Use the same number of wraps. This ensures predictable power output between bands, which reduces accuracy issues caused by uneven tension.
Shaft Selection and Setup
Your shaft is the final link in the power chain. If it is too light for the band setup, you get whipping and poor accuracy. Too heavy and the gun may lack speed.
Shaft diameter is the main factor. Thinner shafts (6.5 mm to 7 mm) are fast and penetrate well with moderate band tension. Thicker shafts (8 mm and above) are better for heavy band setups and large fish because they resist bending on impact.
Tip types also matter. A single flopper tip works for most reef fish up to about 30 pounds. A slip tip is better for big game because it prevents fish from shaking free. Threaded tips allow you to swap between flopper and slip tip depending on the dive.
Shaft length should match your gun barrel length plus about 10 to 15 cm overhang. This gives you enough reach without extending past the muzzle too far. Shorter overhang improves maneuverability in tight reef spots.
Mori shafts are a solid choice for their balance of hardness and straightness. Riffe shafts are also reliable and widely available. If you are building a custom gun, test different diameters with your preferred band setup before committing to one shaft. Beginners may want to pick up a speargun shaft replacement to have on hand while experimenting.

Rigging the Shooting Line
The shooting line connects you to your shaft. If it fails, you lose the shaft and the fish. Getting this right is essential.
Line thickness depends on the target. For reef hunting, 1.5 mm to 2 mm mono is sufficient. For blue water, step up to 2 mm or thicker. Thinner line cuts through water more easily, but thicker line holds up better against abrasion.
Bungee section helps absorb the shock when the shaft hits a fish. A 10 to 15 cm bungee inserted between the shaft and the main line reduces pull-out risk. Without a bungee, a heavy fish can tear the shaft free from the line attachment.
Tying the breech knot is straightforward. Thread the line through the muzzle eye, wrap around the main line six to eight times, and pass the tag end back through the loop. Pull tight. This knot holds well under load and is easy to untie when needed.
Line tangles happen when the line is too long or the bungee is too stiff. Keep the total line length about equal to the gun length plus a small allowance for the bungee. Test the setup in the pool or shallow water before using it on a dive.
Common Mistakes and Fixes
Even experienced divers make rigging errors. These are the most common ones I see:
- Wrong band length: Bands that are too long produce weak shots. Bands that are too short cause excessive recoil and wear. Measure carefully based on your gun’s stretch distance.
- Loose wishbones: If the wishbone slips during draw, the gun misfires. Check knots before every dive. Replace dyneema wishbones if you see fraying.
- Incorrect shaft weight: Pairing a light shaft with heavy bands causes whipping. Pairing a heavy shaft with weak bands reduces speed. Match shaft diameter to band power.
- Line too thick: Thick shooting line creates drag and slows the shaft. Use the thinnest line that still provides adequate breaking strength for your target.
- Neglecting swivels: Without a swivel, line twist accumulates over multiple dives. Install a high-quality ball bearing swivel where the line attaches to the gun.
If you notice any of these issues, fix them before the next dive. It takes ten minutes to swap a band or retie a wishbone. Losing a fish because you ignored a loose connection is not worth it.
Test Firing and Adjusting Your Rig
Once everything is assembled, test the setup in the water before relying on it for a hunt. A pool, calm bay, or shallow reef flat all work.
Load the gun normally and check for bubbles along the band connections. Air escaping indicates a small cut or weak spot in the rubber. Listen for the sound of band stretch. A consistent, even stretch suggests proper band length. Any sudden resistance or odd noise points to an issue.
Shoot at a target 10 to 15 feet away. Watch the flight path. Does the shaft fly straight? Does it wobble? If it wobbles, check the band tension balance. Uneven bands cause the shaft to corkscrew.
Adjust band tension by incrementally shortening or lengthening the bands. Make small changes — 1 cm adjustments can make a noticeable difference. Adjust line length if the shaft pulls to one side after release.
Test again after each adjustment. It might take two or three rounds to get the setup dialed in. That is normal. Once it shoots straight and consistent, you are ready for the real thing.
Maintenance and When to Replace Parts
Saltwater is harsh on speargun components. Regular maintenance extends the life of your rig and prevents failures at the worst times.
Rinse your gun with fresh water after every dive, especially the muzzle and band slots. Dry the bands completely before storing. Store the gun in a cool, shaded area. Direct sunlight degrades rubber quickly.
Inspect bands every month for cracks, discoloration, or stiffness. Replace them at the first sign of wear. Most bands last 6 to 12 months depending on use and storage conditions.
Check wishbones after every few dives. Look for fraying near the knot or loop. Dyneema wishbones can last a year or more if cared for, but replace them at the first sign of damage.
Examine the shooting line for abrasions. Run your fingers along the line to feel for rough spots. Replace it if you find any damage, especially near connections.
Carry spare bands and wishbones in your dive bag. A silicone spray or band conditioner helps maintain rubber flexibility. Some divers use spare part kits from brands like Rob Allen that contain everything you need for quick field repairs. Frequent users may benefit from a speargun maintenance kit to keep components in top shape.
Alternative Rigging Styles for Different Conditions
No single rigging style works for every dive. Understanding when to adapt your setup makes you more effective.
Euro rigging uses a slimmer gun with a single band and a thin shaft. It is ideal for reef hunting in clear water where accuracy matters more than raw power. Euro setups reload fast and are quiet.
American rigging typically uses a thicker gun with multiple bands and a heavier shaft. It suits blue water hunting and large fish where penetration is critical. American guns are slower to reload but deliver more power.
Slip tip setups are popular for big game like tuna or wahoo. The tip slides along the shaft after impact, reducing the fish’s leverage. This setup requires a specialized shaft and line configuration.
Reverse mech guns are designed for deep water. The mechanism is positioned near the muzzle, which reduces shaft drag and improves accuracy at longer range. These guns need careful band tuning to perform well.
Consider your environment before choosing a style. Reef divers rarely need double bands. Blue water hunters often do. Match the rig to the conditions, not to what looks impressive.

Gear Checklist for a Reliable Rig
If you are building a new rig or upgrading an existing one, here is what you should have on hand:
- Quality speargun bands (pre-cut or bulk rubber)
- Spare wishbones (dyneema or rubber)
- Crimping tool and crimps
- Dyneema line for wishbones and connections
- Monofilament shooting line (1.5 mm to 2 mm, depending on target)
- High-quality ball bearing swivels
- Bungee section (10 to 15 cm)
- Silicone spray or band conditioner
- Replacement shaft if upgrading or spares
- Small repair kit bag
Many dive shops sell pre-assembled kits that include bands, wishbones, and line. These are good starting points if you want to avoid piecing together individual components. Brands like Speardiver and Neptonic offer complete rigging kits that come with clear instructions.
Final Thoughts: Build It Right, Dive with Confidence
Rigging your speargun correctly takes practice. You will make mistakes, and that is fine. Every misstep teaches you something about how your gear behaves. what matters is to be consistent, test your rig before relying on it, and replace parts before they fail.
Start with proven brands and components. You do not need the most expensive gear, but you do need reliable parts. A well-rigged mid-range gun outperforms a poorly rigged high-end gun every time.
When your rig is dialed in, you stop thinking about the equipment and start reading the water. That is when the real hunting begins.
Ready to get started? Find your options here.