How to Handle Large Pelagic Fish After the Shot: A Practical Guide
The Moment After the Shot: What to Do First
You’ve just put a shaft through a decent-sized yellowfin, or maybe a wahoo. The first few seconds after the shot will decide whether you land that fish or watch it disappear with your gear. Staying calm is the hardest part, but it’s the most important. Your adrenaline is spiking, but you need to think clearly.
My first big pelagic nearly pulled me under. Handling big fish after the shot is a skill nobody teaches beginners.
Your priority is controlling the fish. If you have a good shot — through the upper body, behind the gill plate — you’re in a strong position. A poor shot, like one in the tail or soft belly, means you need to be ready for a second shot as fast as possible. Keep your gun loaded and aimed. Don’t assume the first shot will stop a big pelagic. They have a lot of fight left in them.
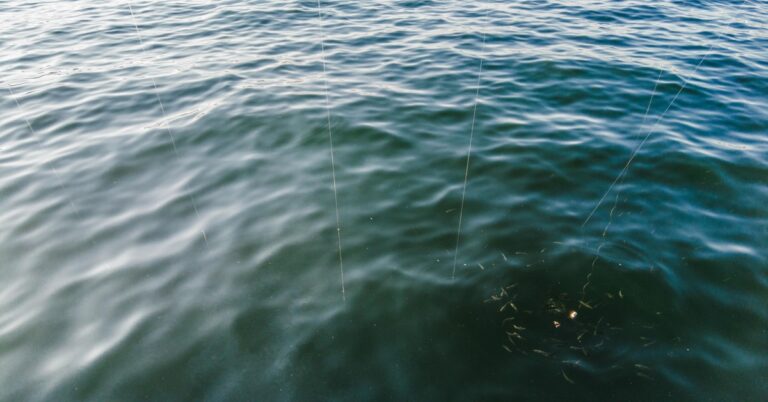
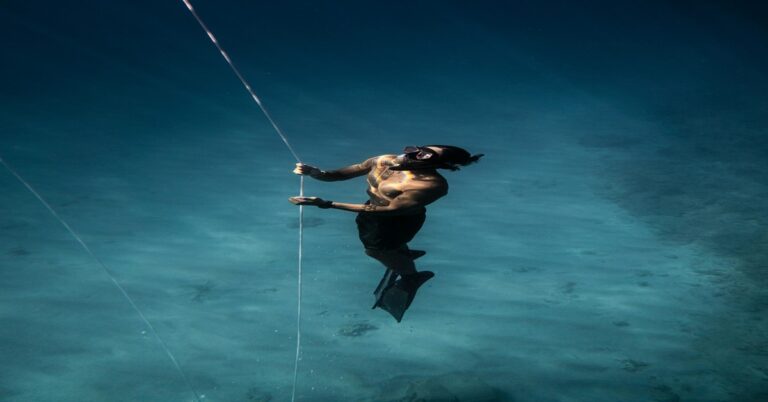
Maintain line tension. Whether you’re using a reel or a floatline, keep the line tight. A slack line gives the fish leverage to wrap around structure or shake the shaft. If the fish is still swimming hard, let it run. Don’t try to horse it in immediately. You’ll just pull the shaft loose or break your gear. Let the fish tire itself out against the resistance of your float or reel drag.
Never approach a fish that is still green. A green fish is one still thrashing and swimming with purpose. It can injure you with its bill, teeth, or spines. It can also wrap you in line. Wait until the fish visibly slows down, rolls on its side, or stops pulling hard. That’s when you start thinking about getting close.

Controlling the Fish: Line Management and Pressure
Once the initial run is over, it becomes more of an endurance game. You need to apply steady, consistent pressure to tire the fish without snapping your line or pulling the shaft. This is where your gear choice really matters.
If you’re using a float, the fish will be pulling against a bungee and the float itself. A good bungee absorbs the shock of sudden runs, which reduces the chance of the shaft tearing out. I prefer a bungee that stretches to about double its resting length. Too stiff, and you risk pulling the shaft. Too soft, and you don’t put enough pressure on the fish. That sweet spot varies by setup, but a 5/16â³ or 3/8â³ bungee works well for most pelagics up to 60 pounds. Divers looking for reliable options may want to browse spearfishing bungee floatline options.
Reels are different. They give you direct control and make it easier to fight a fish without dragging a float across the surface. But they have a downside: they can cause you to lock up and break the line if you get impatient. The key with a reel is to keep the drag light enough that the fish can pull line under resistance, but heavy enough that you’re still wearing it down. A common mistake is cranking the drag too tight out of excitement. Back it off a quarter turn from where you think it should be. You can always tighten it later.
For both setups, avoid letting the fish wrap line around your body or fins. That’s how people drown. Keep the line in front of you, and if the fish circles, move to stay on its side. A straight line between you and the fish is safer and more effective.
When to Approach and When to Wait
Knowing when to move in is something you pick up with experience. You’ll know the fish is ready when it stops making strong runs and starts swimming in slow, wide circles. It might roll on its side briefly or stop swimming altogether for a moment. That’s your window.
If you’re solo, wait until the fish is nearly exhausted. A big tuna can still explode with energy even after 10 minutes of fighting. I’ve seen guys lose a fish because they got within arm’s reach and the fish suddenly surged, pulling the shaft free. If you have a buddy, one of you can stay on the gun while the other approaches. That way, if the fish bolts, there’s still someone ready to shoot again.
Never approach a fish that is still making short, violent bursts. Those bursts mean it still has energy. Give it more time. Let the float or reel do the work. Your job is to stay patient and ready.
The Approach: How to Secure a Large Pelagic
When you’re sure the fish is subdued, the approach needs to be deliberate. The goal is to secure the fish without getting hurt or losing it. The method depends on the species and where the shaft is placed.
If the shaft is through the head or upper body, you can often grab the shaft itself. Wrap your hand around the shaft near the fish’s body, not near the tip. Keep your fingers clear of the barb. With your other hand, you can guide the fish’s head away from your body. For tuna, avoid the mouth — those teeth are sharp and their bite force is real. For wahoo, the mouth is a razor blade factory. Never put a hand near a wahoo’s mouth.
A tail grab is effective for tuna and mahi. If the fish is calm, slide your hand down the body to the tail wrist. Squeeze firmly and lift. The tail is a strong handle, and it keeps the fish’s head away from you. On a big fish, a tail grab gives you leverage to control the fish while you reach for your stringer or knife. For wahoo and barracuda, be aware of the dorsal spines. They’re not venomous like a lionfish, but they can still give you a nasty puncture wound that gets infected quickly.
Pull the fish toward you using the floatline or shooting line, not the spear shaft. Pulling on the shaft can work it loose. Instead, use the line to reel the fish in close, then secure it with a hand on the tail or through the gill plate. If the fish is still bleeding heavily, get it on a stringer or in a game bag quickly. Blood attracts sharks.

Essential Gear for Handling Big Fish
You can’t handle large pelagics reliably with reef gear. The forces involved are just too high. If you’re serious about targeting tuna, wahoo, or mahi in open water, you need a setup that won’t fail at the worst moment.
A strong floatline is essential. Look for something rated at 400 pounds or more. Riffe makes good floatlines, but brands like Mori and Rob Allen are also solid. The line needs to be abrasion-resistant because it will rub against the fish’s body, your gun, and whatever structure is around. I prefer a floating line because it stays on the surface and is less likely to tangle around your legs.
A breakaway rig is essential for big tuna. This setup uses a separate line attached to the spear shaft via a slip tip or a breakaway tab. The shaft stays in the fish while the gun is detached, so you’re not wrestling a tuna with a 55-inch gun attached to it. After the shot, the gun floats free, and you fight the fish on the floatline or reel. Breakaway kits from Mori and Riffe are reliable and easy to rig. If you’re targeting fish over 60 pounds, a breakaway rig is the standard. For those upgrading their setup, checking out spearfishing breakaway rig options is a good starting point.
Reels are another option, but they require more discipline. A good reel for pelagics should have a strong drag, a large line capacity (300 yards of 2mm line minimum), and a sturdy construction that won’t corrode after a few saltwater trips. Hammerhead makes reels that are popular in the spearfishing community, and for good reason. They’re robust and reliable. But a reel setup is not beginner-friendly for big fish. It takes practice to manage the line under pressure.
Finally, a good knife is critical. You need to be able to cut line quickly if something goes wrong. A blunt knife is worthless. Keep it sharp and accessible on your thigh or forearm.
Common Mistakes When Handling Large Pelagics
The most common mistake is rushing the approach. You get excited, the fish looks tired, and you swim in too fast. The fish rallies, you lose the shaft, and the fish swims off with your gear. I’ve done it. Every experienced spearfisher has done it. The fix is simple: wait longer than you think you need to.
Another mistake is using inadequate gear. A 300-pound floatline might work for reef fish, but it can snap under the pressure of a big tuna. Check your gear before you go out. Load test your lines. Replace anything that shows fraying or corrosion. Your gear is your lifeline.
Many beginners grab the fish by the gills without thinking. On a small fish, that works. On a big tuna, the gill rakers are like coarse sandpaper and can cut your hands badly. Plus, you need the gills intact for bleeding. If you crush them, you reduce the quality of the meat.
Sharks are another factor. I’ve had situations where a shark appeared out of nowhere while I was dealing with a fish. If you see a shark, don’t panic, but also don’t ignore it. A shark that’s circling is assessing. A shark that’s moving in fast is a problem. If a shark wants your fish, sometimes it’s smarter to let go. One fish isn’t worth a trip to the hospital.
Dealing with Sharks and Other Predators
Sharks are a reality when spearfishing pelagics. The smell of blood, the vibrations of a struggling fish — it’s like ringing a dinner bell. You can’t prevent every shark encounter, but you can manage the risk.
Keep the fish as far from you as possible while you’re fighting it. If you’re using a float, the fish is usually 20 to 30 feet away. That distance means the shark is more likely to go after the fish than you. Don’t try to bring the fish close to you until you’re ready to secure it. And when you do, make sure your buddy is watching for sharks.
A shark shield or a bang stick can help. A shark shield creates an electric field that deters most sharks. It’s not 100% effective, but it’s better than nothing. A bang stick is a last resort. If a shark gets aggressive and you can’t scare it off with noise or a poke, a bang stick can stop the threat. But it’s a serious tool, and you need to know how to use it safely. Most of the time, just staying calm and keeping your fish away from you is enough. Sharks are curious, not always aggressive.
If a shark takes your fish, let it go. Don’t try to fight a shark for a fish. It’s not worth the risk. And honestly, it’s part of the deal when you’re hunting at the top of the food chain.
Bleeding, Gutting, and Preserving Meat Quality
The moment the fish is secured, the clock starts ticking on meat quality. For species like yellowfin tuna, wahoo, and mahi, immediate bleeding and cooling are crucial. The faster you do it, the better the meat tastes.
For bleeding, cut the gills on both sides of the head. This allows the blood to drain quickly. You can also cut the tail artery, but the gill cut is the most effective. Hold the fish by the tail and let the blood drain into the water. Do this before you gut the fish. Bleeding first reduces the blood that soaks into the flesh.
Gutting should happen as soon as possible after bleeding. Remove the entrails, being careful not to puncture the stomach or intestines. If the fish has been feeding, the stomach contents can spoil the meat if left inside. Rinse the body cavity with seawater. On a boat, you can do this immediately. If you’re shore diving, you may need to do it in the water or wait until you’re back on the beach.
Iki jime is a technique from Japan that’s gaining popularity in spearfishing. It involves inserting a spike into the fish’s brain immediately after the catch, which kills the fish instantly and stops the release of stress chemicals that degrade meat quality. A simple iki jime spike costs around $20 and is worth the investment if you value high-quality meat. For those interested in improving meat preservation, looking into iki jime spike tool options can be helpful.
Cooling is the next step. The ideal situation is an ice slurry: a mixture of ice and seawater that’s cold enough to drop the fish’s temperature fast. Slush ice works better than just ice on its own because it surrounds the fish completely. Never use freshwater ice directly on the meat — it dilutes the flavor. A good cooler with an ice slurry can keep your catch prime for hours.
The Best Way to Land a Large Pelagic Onto a Boat or Kayak
Getting a big fish into the boat without damage or danger takes technique. If you have a boat, the easiest method is to use a game bag or a large mesh basket. Pull the fish inside the bag, then lift it over the side. This prevents the fish from sliding off and reduces mess.
If you don’t have a game bag, a tail rope works. Tie a rope around the tail wrist, then pass the rope up to someone on the boat. They can haul the fish up while you guide the head. This method keeps the fish stable and prevents it from thrashing once it’s onboard.
On a kayak, landing a large pelagic is harder. The kayak is unstable, and a big fish can tip you over. The safest approach is to deflate the fish by making a small incision in the belly to release gas. Then, use a game bag or bungee to secure the fish alongside the kayak. Some kayak fishers use a parachute or sea anchor to stabilize the kayak while they handle the fish. If the fish is too big, tow it to shore. Don’t try to lift it onto the kayak. It’s not worth capsizing.
For all boats and kayaks, watch out for sharp fins, teeth, and spines. A wahoo’s dorsal fin can cut through gloves. A tuna’s tail can break a nose. Handle the fish with respect, even after it appears dead.

Choosing the Right Gear Setup Based on Fish Size and Species
Gear selection depends on what you’re hunting. A wahoo setup is different from a yellowfin tuna setup. Understanding these differences helps you avoid being under-gunned.
For wahoo and mahi up to 40 pounds, a standard reef setup can work, but it’s pushing it. A 110 or 120 cm gun with a reel and a 200-pound leader is sufficient. These fish are fast, but they don’t have the raw power of a tuna. A breakaway rig isn’t necessary, but a slip tip helps ensure the shaft stays in the fish.
For yellowfin tuna, bigeye, and other large pelagics over 40 pounds, a breakaway rig is essential. You want a gun that’s at least 130 cm, preferably with a roller mechanism or a reverse trigger for better line management. The shaft should be 7.5mm or 8mm thick. A slip tip is preferred over a three-cut tip because it provides better retention. The floatline needs to be 400-pound or stronger. A float with a bungee is standard. Riffe, Mori, and Hammerhead all make gear that works well for these scenarios.
If you’re targeting multiple species in the same trip, a versatile setup is a 120 cm gun with a reel and a back-up breakaway rig. This allows you to adapt based on what shows up. But for dedicated pelagic hunting, it’s better to have a dedicated rig. Mixing gear leads to compromises that cost you fish.
The tradeoff between a float and a reel comes down to personal preference and conditions. Floats are safer in open water because they give the fish a place to run and keep the line away from you. Reels give you more control but require more skill. If you’re new to big fish, start with a float. It’s more forgiving.
Final Considerations: Safety, Practice, and Respect
Handling large pelagic fish is one of the most rewarding parts of spearfishing, but it demands respect. The fish are powerful, the environment is unpredictable, and the risks are real. Every time you’re out there, you’re learning. The more you practice, the better you get at reading fish behavior, managing line, and securing your catch.
Don’t cut corners on gear. A well-setup gun with reliable lines and a sharp knife isn’t a luxury — it’s safety equipment. If you’re considering upgrading your setup, look at options like Riffe floatlines, Hammerhead reels, or Mori breakaway kits. A good setup makes the difference between landing a fish and coming home with a story about the one that got away.
And finally, respect the fish. It took years for that tuna to grow to 80 pounds. Bleed it quickly, cool it properly, and use every part you can. That’s the mindset of a responsible hunter. The ocean gives us these opportunities, and it’s our job to treat them with care.
Ready to get started? Find your options here and build a rig that’s ready for the big ones.